Top 04 Go-To Hairstyles (Long Hair)
LONG HAIR EDITION
Well hello you beautiful devil you. NICE TO SEE YOU! I am happy to introduce the new category on MaddyCorbin.com — Beauty & Hair. This was the most sought after & voted on section from my Instagram @maddy.corbin, after getting countless direct messages on "how I curl my hair" and "how I put the beret over the buns without messing them up" I decided to create a Long Edition of my Top 04 Go-To Hairstyles. *secret time* tomorrow I am chopping my hair off and bleaching it for my trip to NYC this weekend! Because of this, you can bet your cute Instagram feed that I will be doing a Short Edition in a few months!
I am excited to see how you style your hair! If you do any of my styles be sure to hag me #MaddyCorbinBeauty so I can see & share! Also, don't be afraid of the Pin, you can pin any of these images to save to your well put together life via Pinterest. So, what's your go-to style this winter? Drop me a comment!

01 — "The Twins"
two buns topped with the perfect UO beret
02 — "Fish Out Of Water"
your basic fish-tail braid swooped to the side

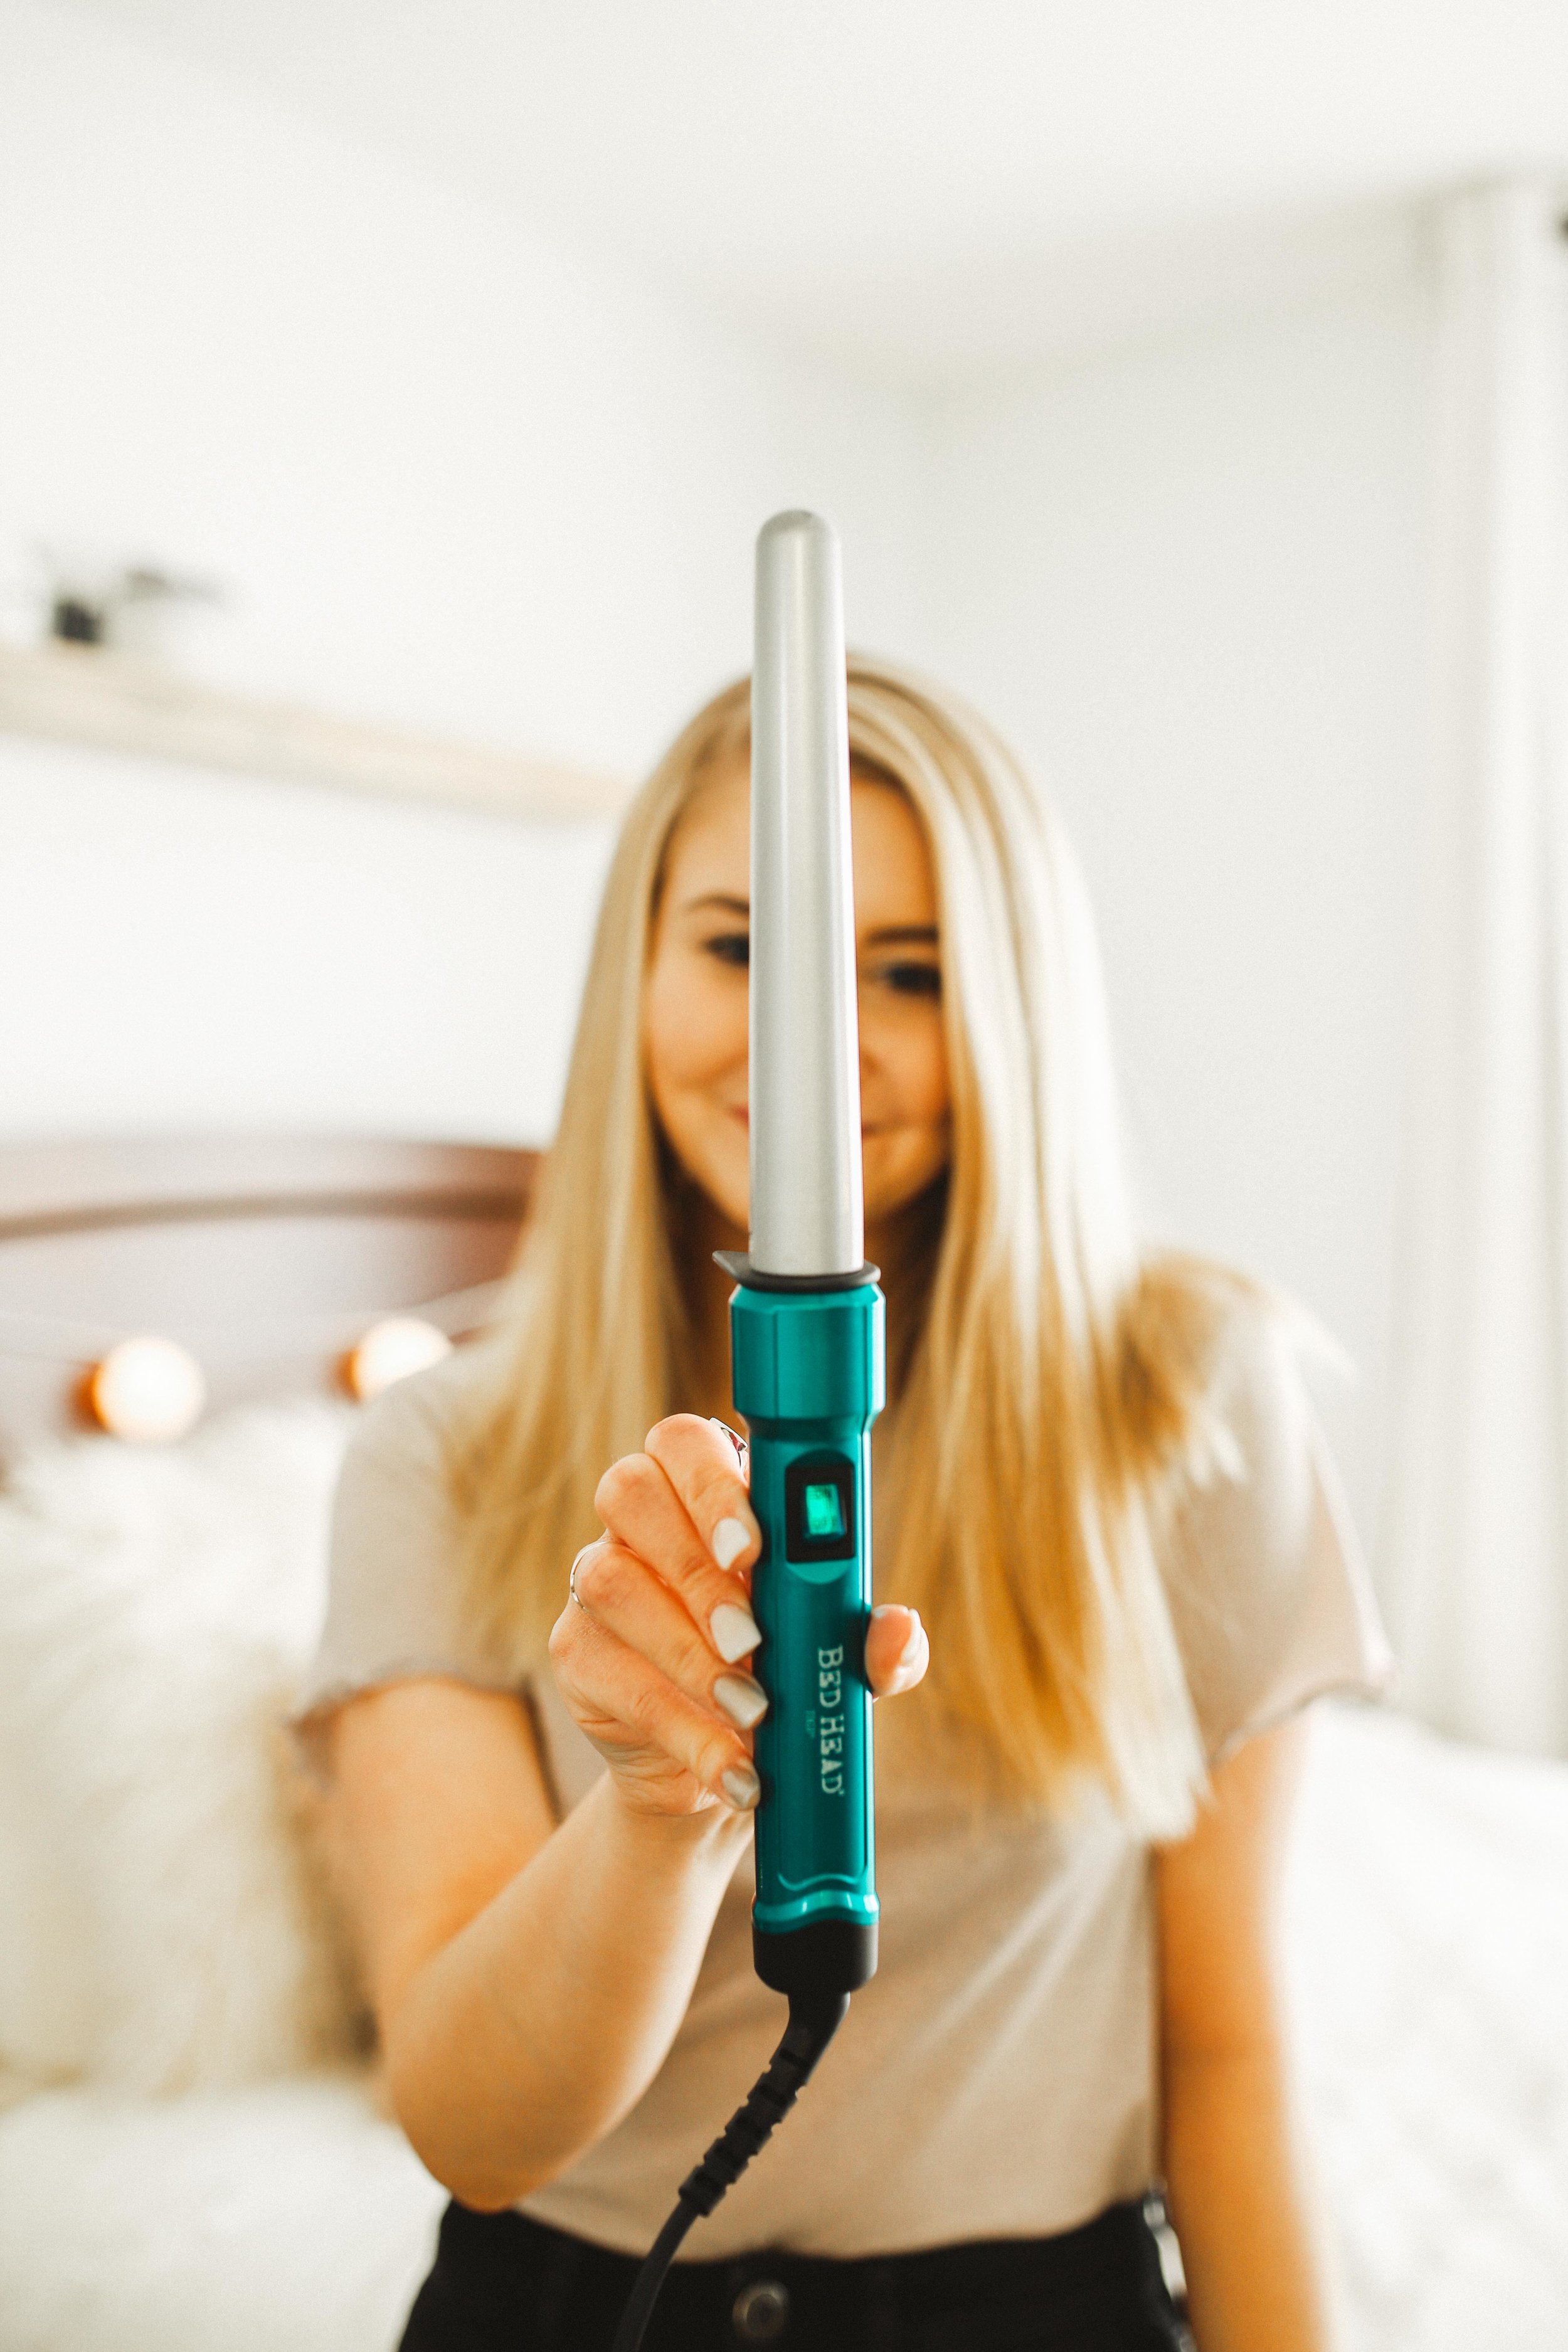
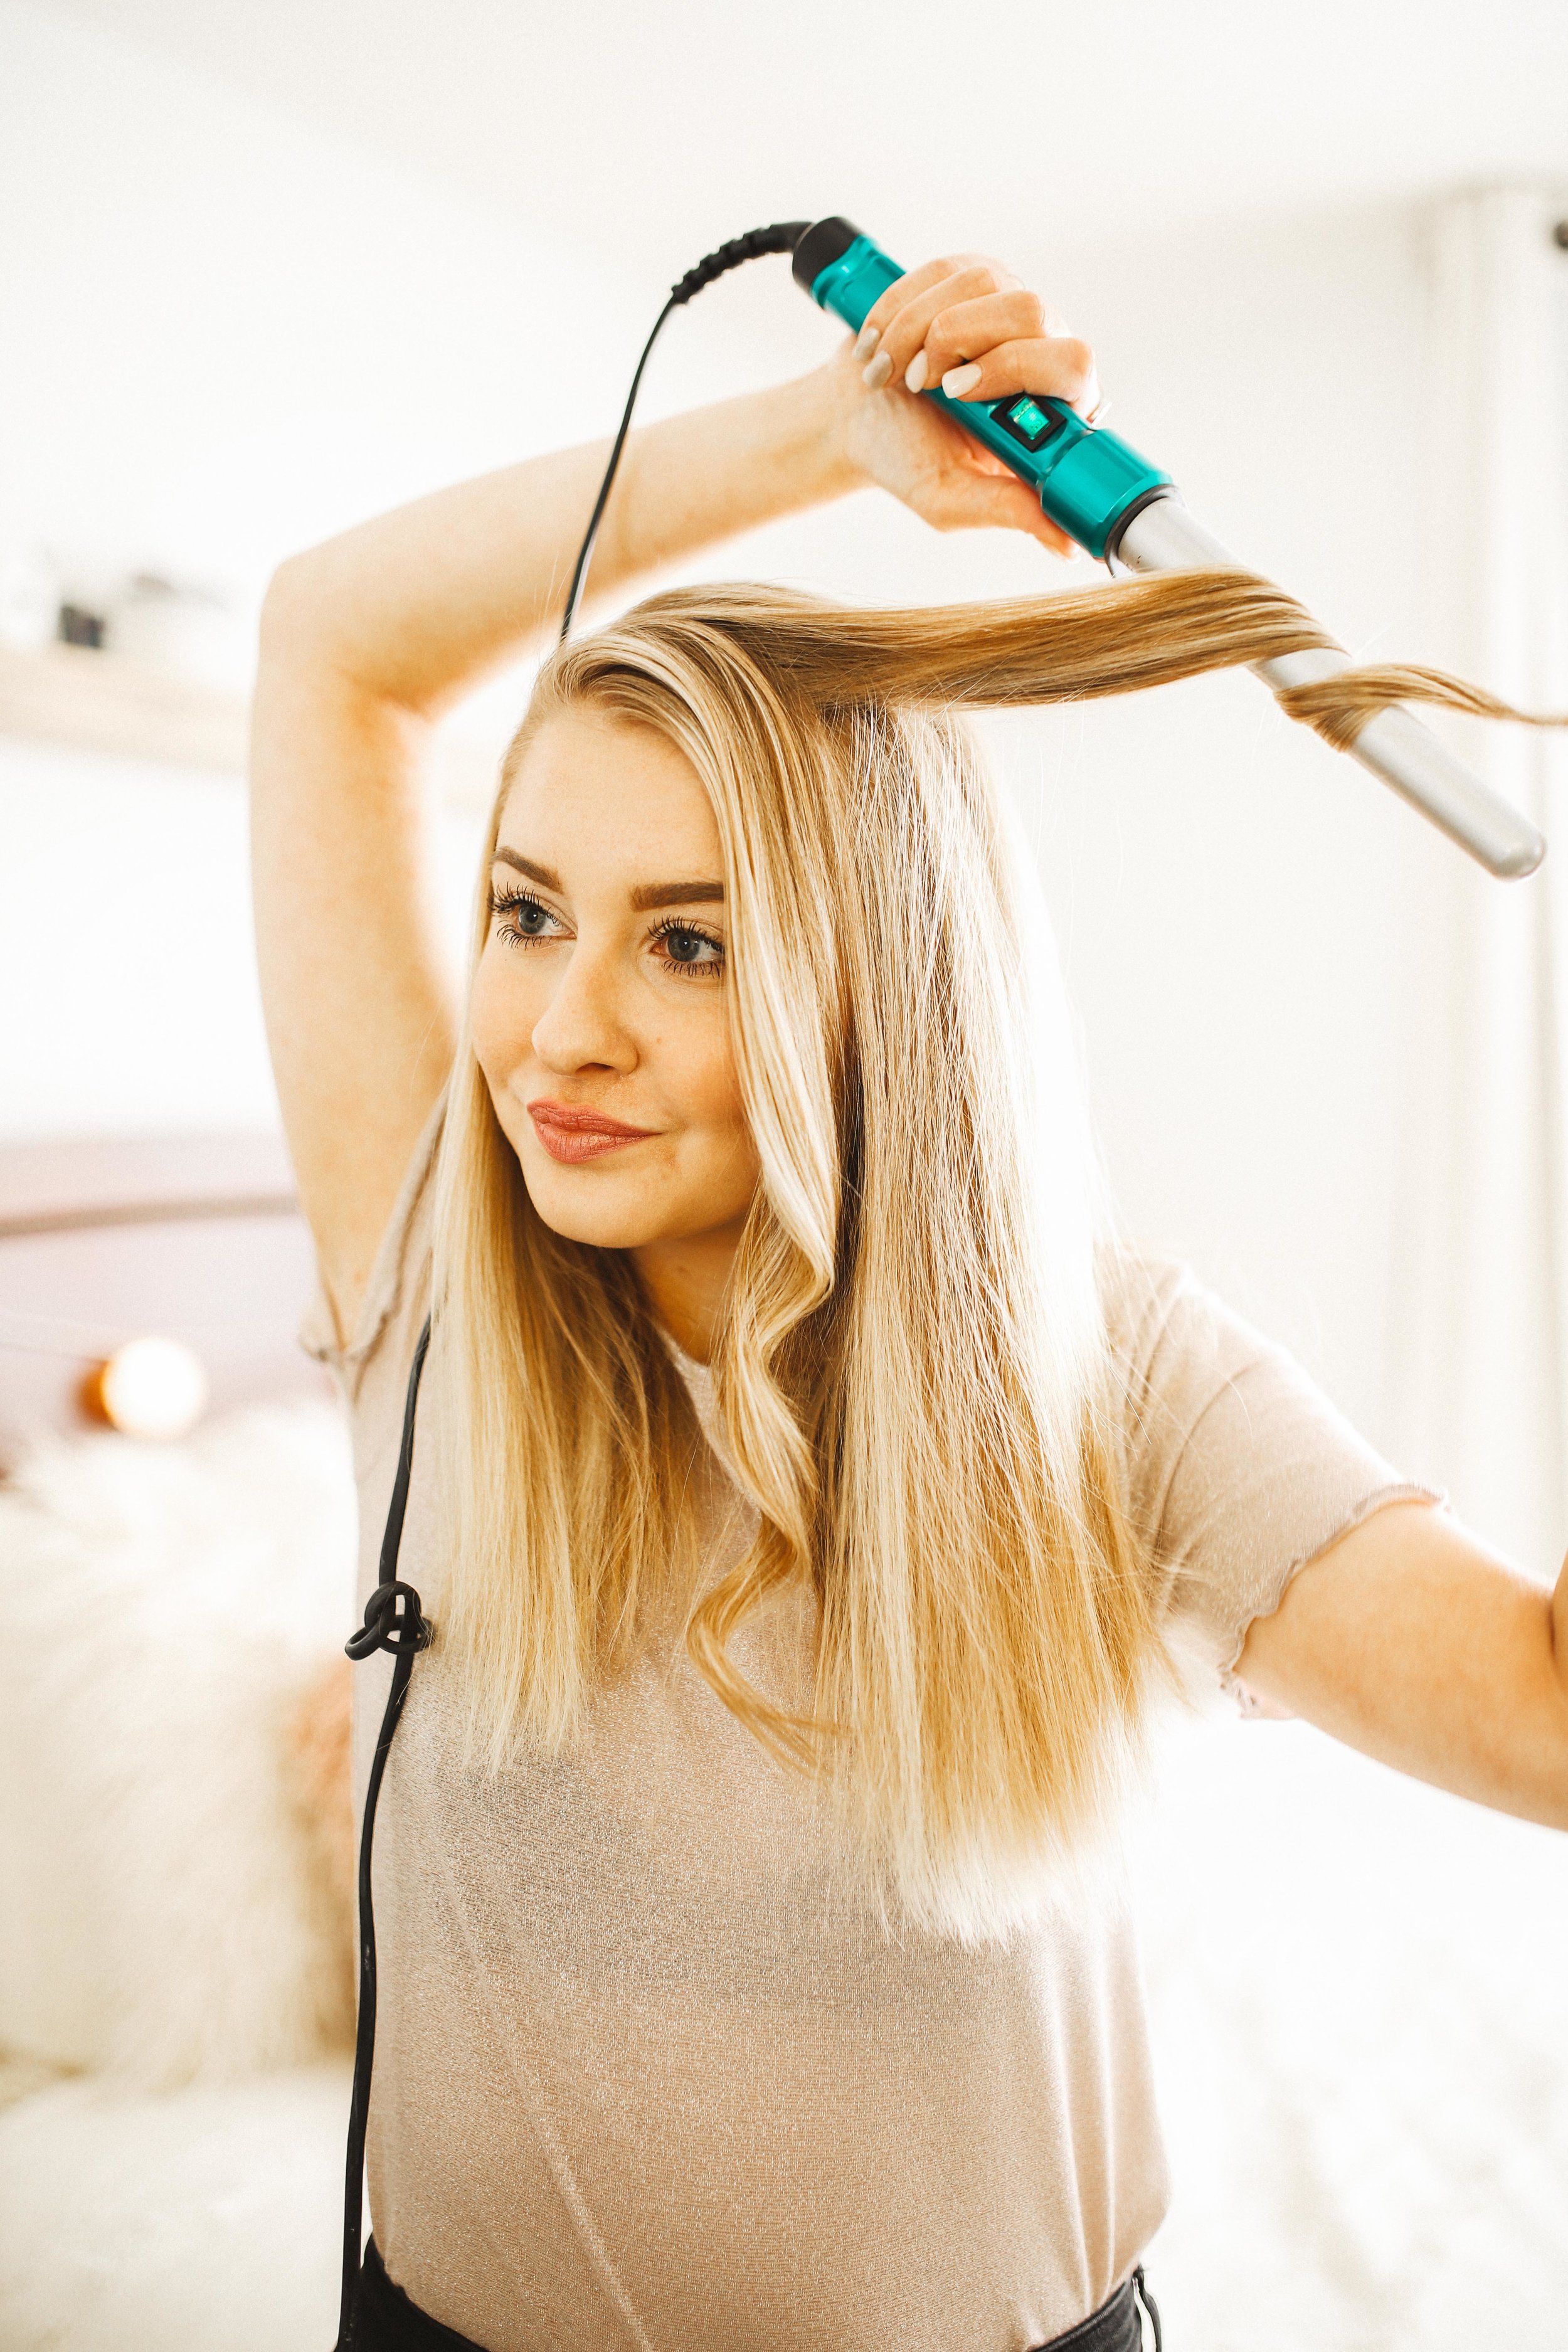
03 — "Goldilocks"
the perfect curls with my Bedhead wand

04 — "Cherry On Top"
a mini-bun to sit on top of a bed of curls
THE TWINS ↓
two buns topped with the perfect UO beret
Step 01: Brush through your preferable blown-dry hair.

Step 02: Make a part down the middle of your head, all the way toward the back.

Step 03: Separate your parted sections and tie one off with the elastic of your choice.

Step 04: Take one of your sections — twist it, and place your finger at the top as seen below.

Step 05: Wrap the twisted hair around your finger completely. Use elastic to sure twist while taking finger out.

Step 06: Move, scrunch, pin and secure as you feel best looks. This is where the fun comes in. Once you get it where you like, find a loose piece and wrap it around the elastic & secure it!

Step 07: Do the same thing to the other side! Bring on the TWIN!

Step 08: Use previous steps until the second bun looks up to par. Don't forget that even though they are called the twins, these babies are fraternal, no 2 buns are the same!

Step 09: Hold open the beret wide & slide on top of your head, this is perfect because it can hide any fly-aways or "oops!" This is when you could add hairspray as well if you prefer!

Step 10: Take a selfie because you just transformed yourself into the cute french girl everyone wants to paint. Be sure to share your selfie with #MaddyCorbinBeauty so I can spam you.

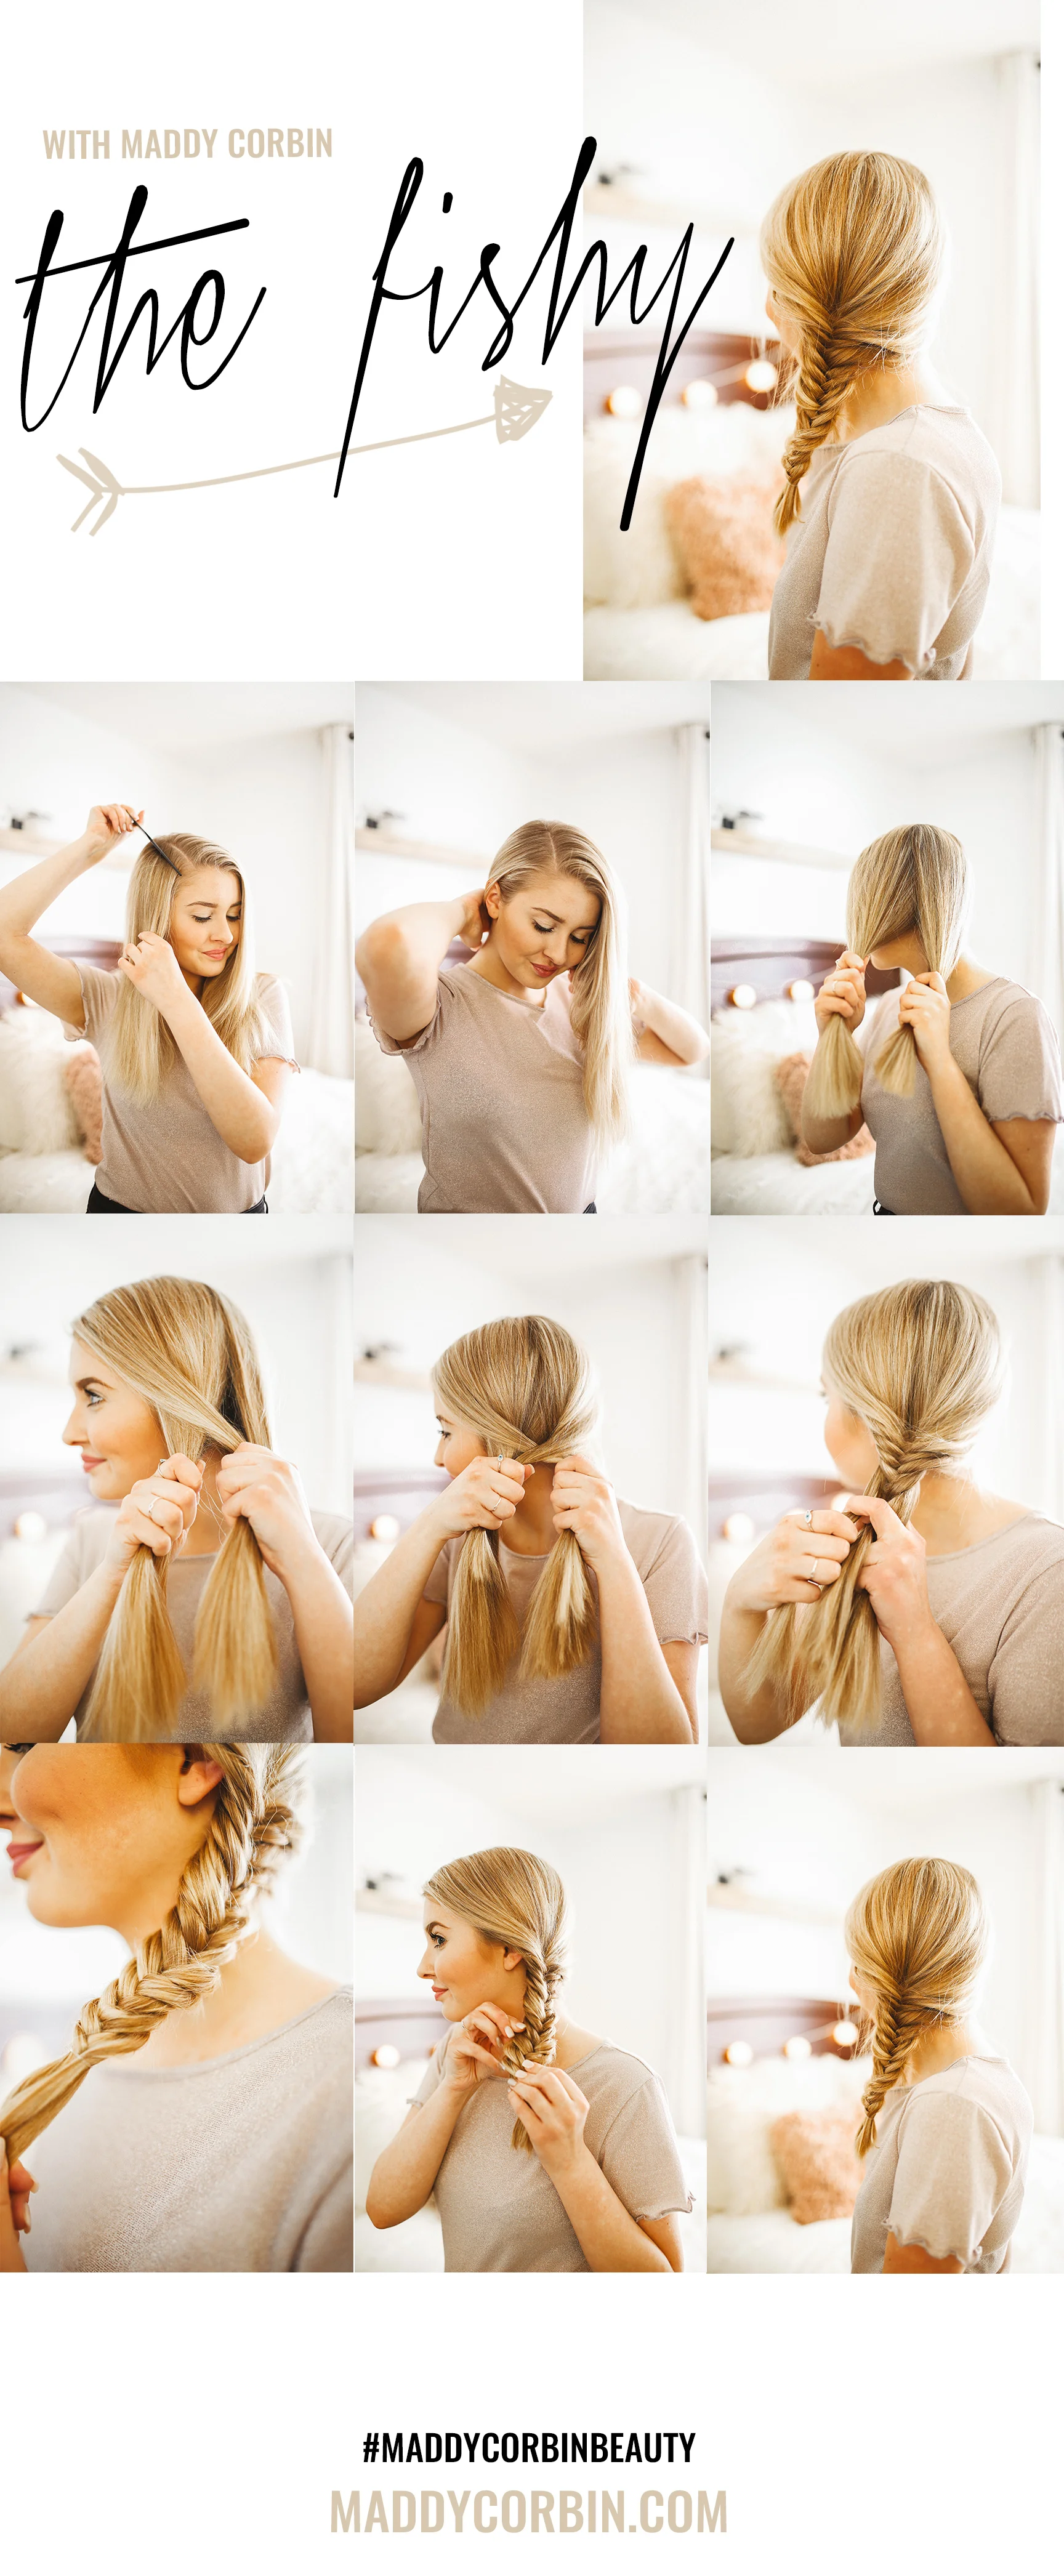
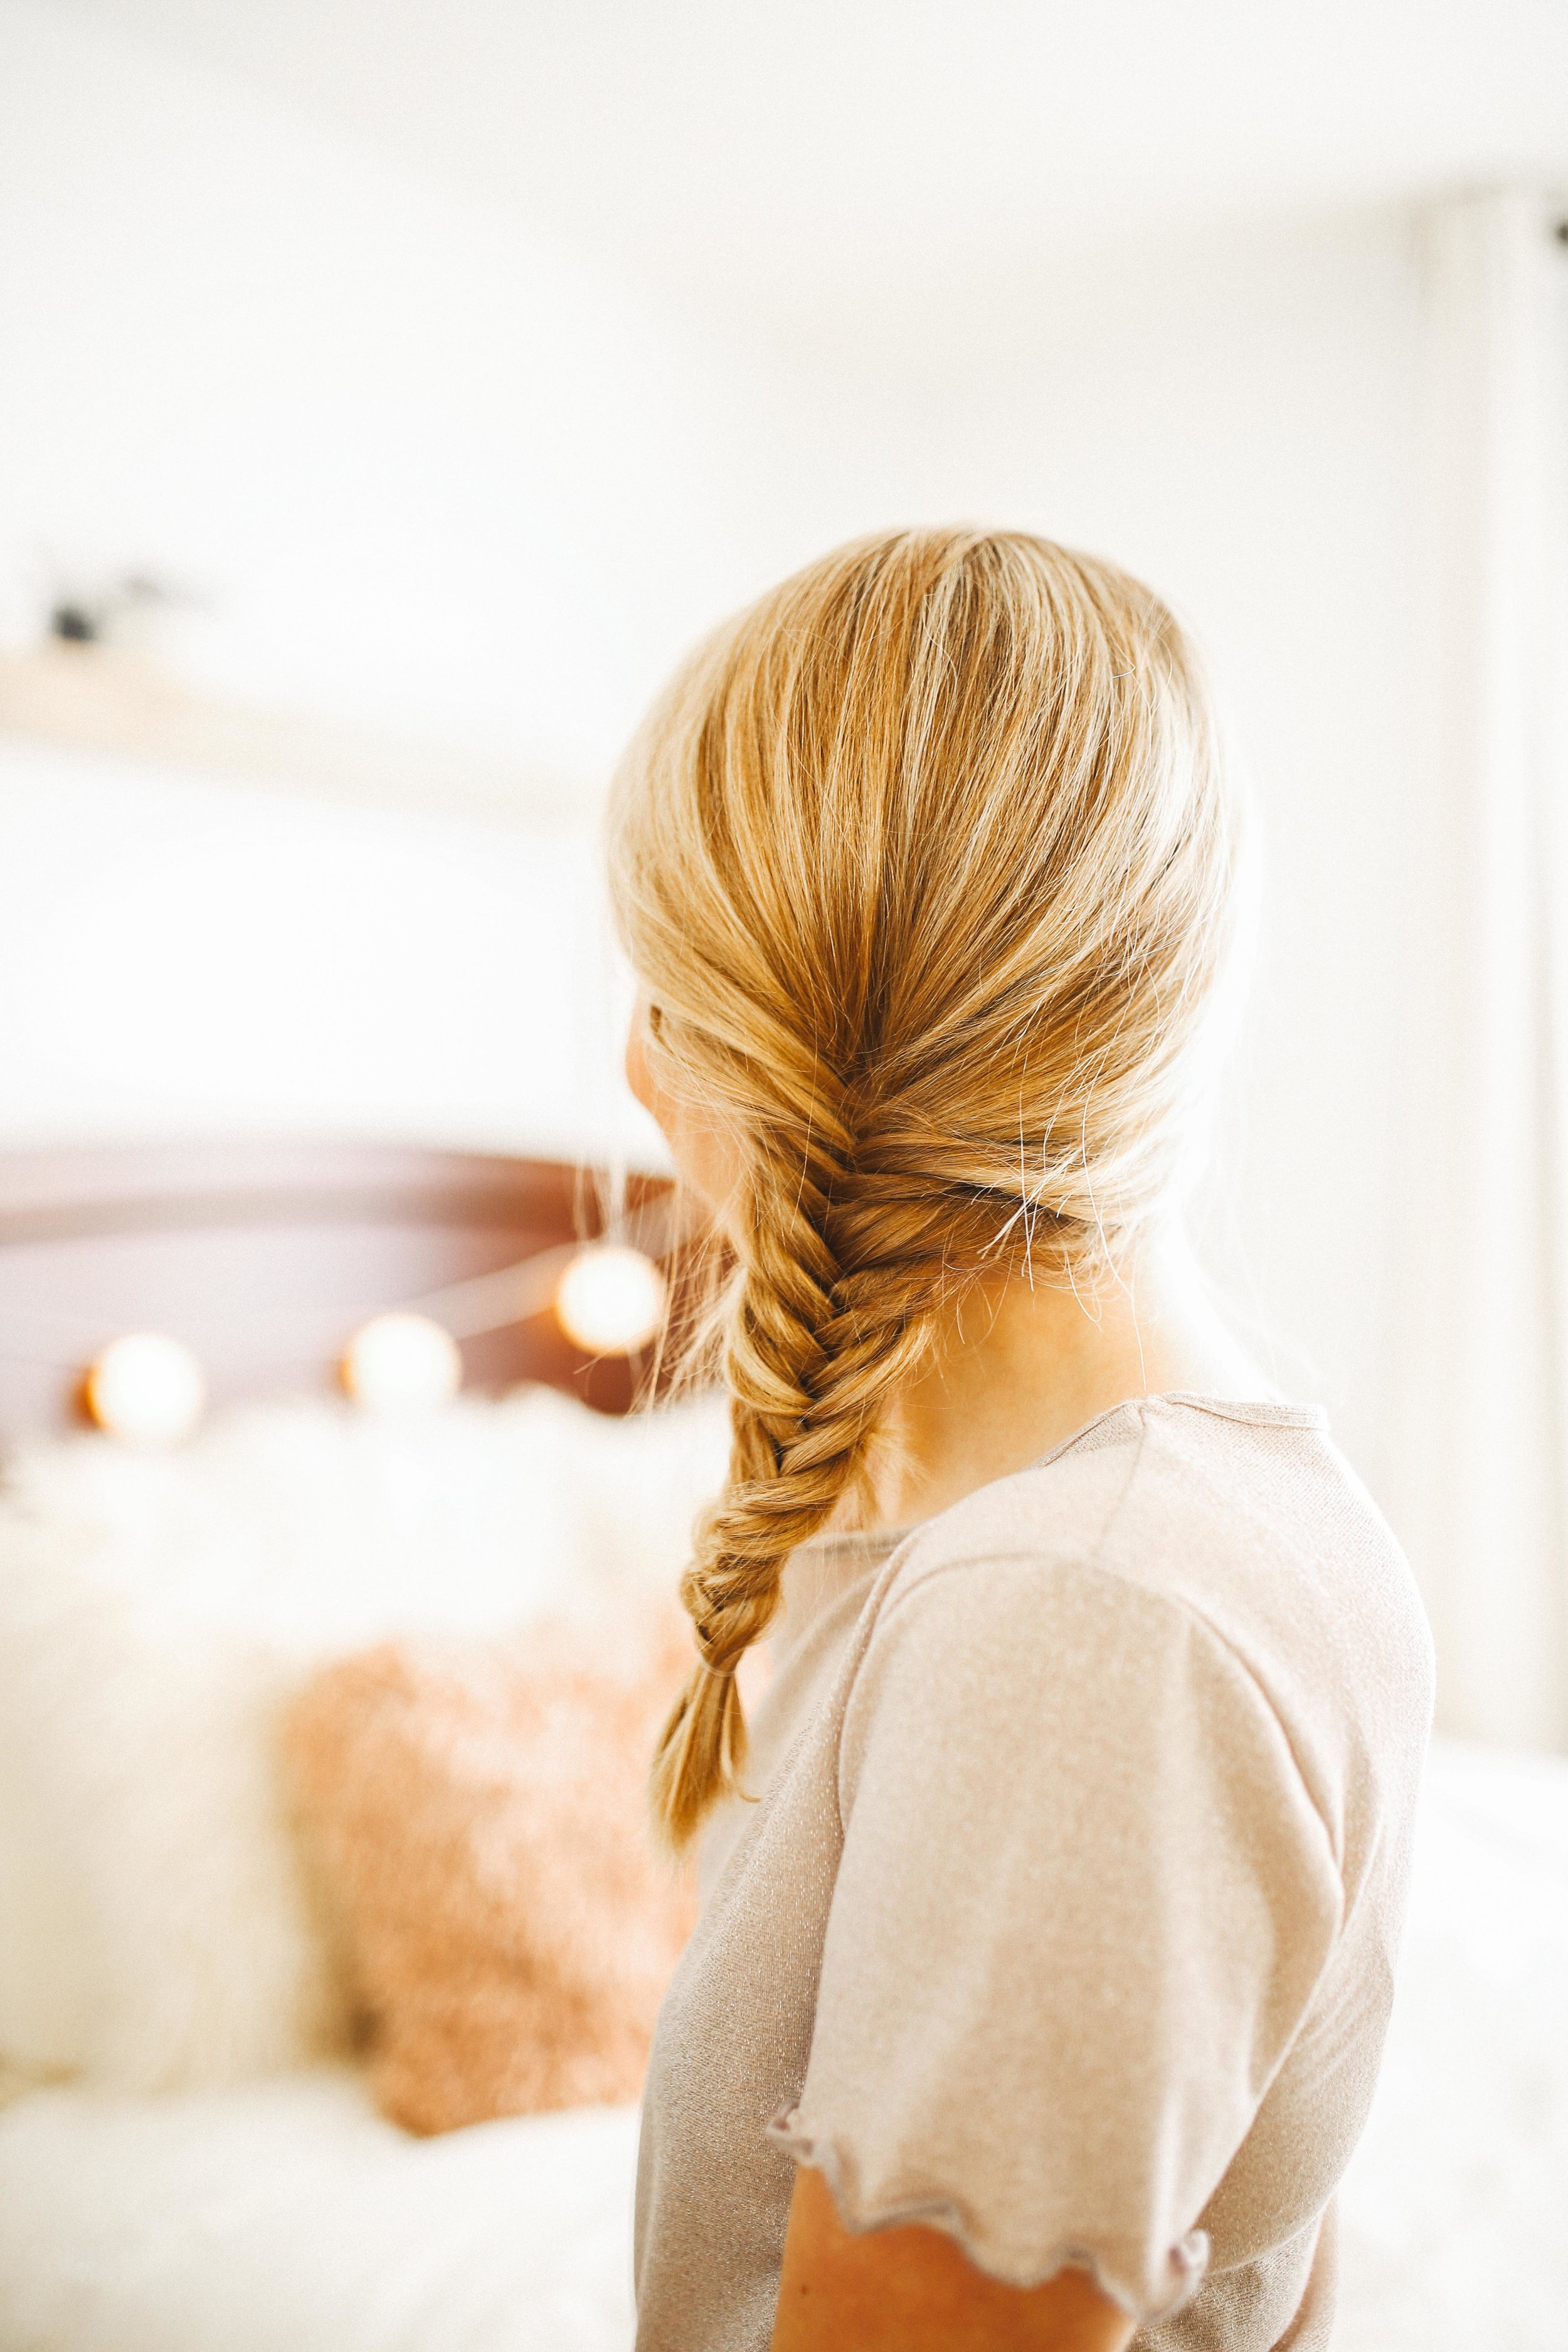
FISH OUT OF WATER ↓
your basic fish-tail braid swooped to the side
Step 01: I always start with my natural part because it is to the side!

Step 02: Brush all of your hair over to one side, whichever your hair-line best follows.

Step 03: Separated all of your hair into two equal sections.

Step 04: Bring a small part from the outer edge of one section and add it to the other side.
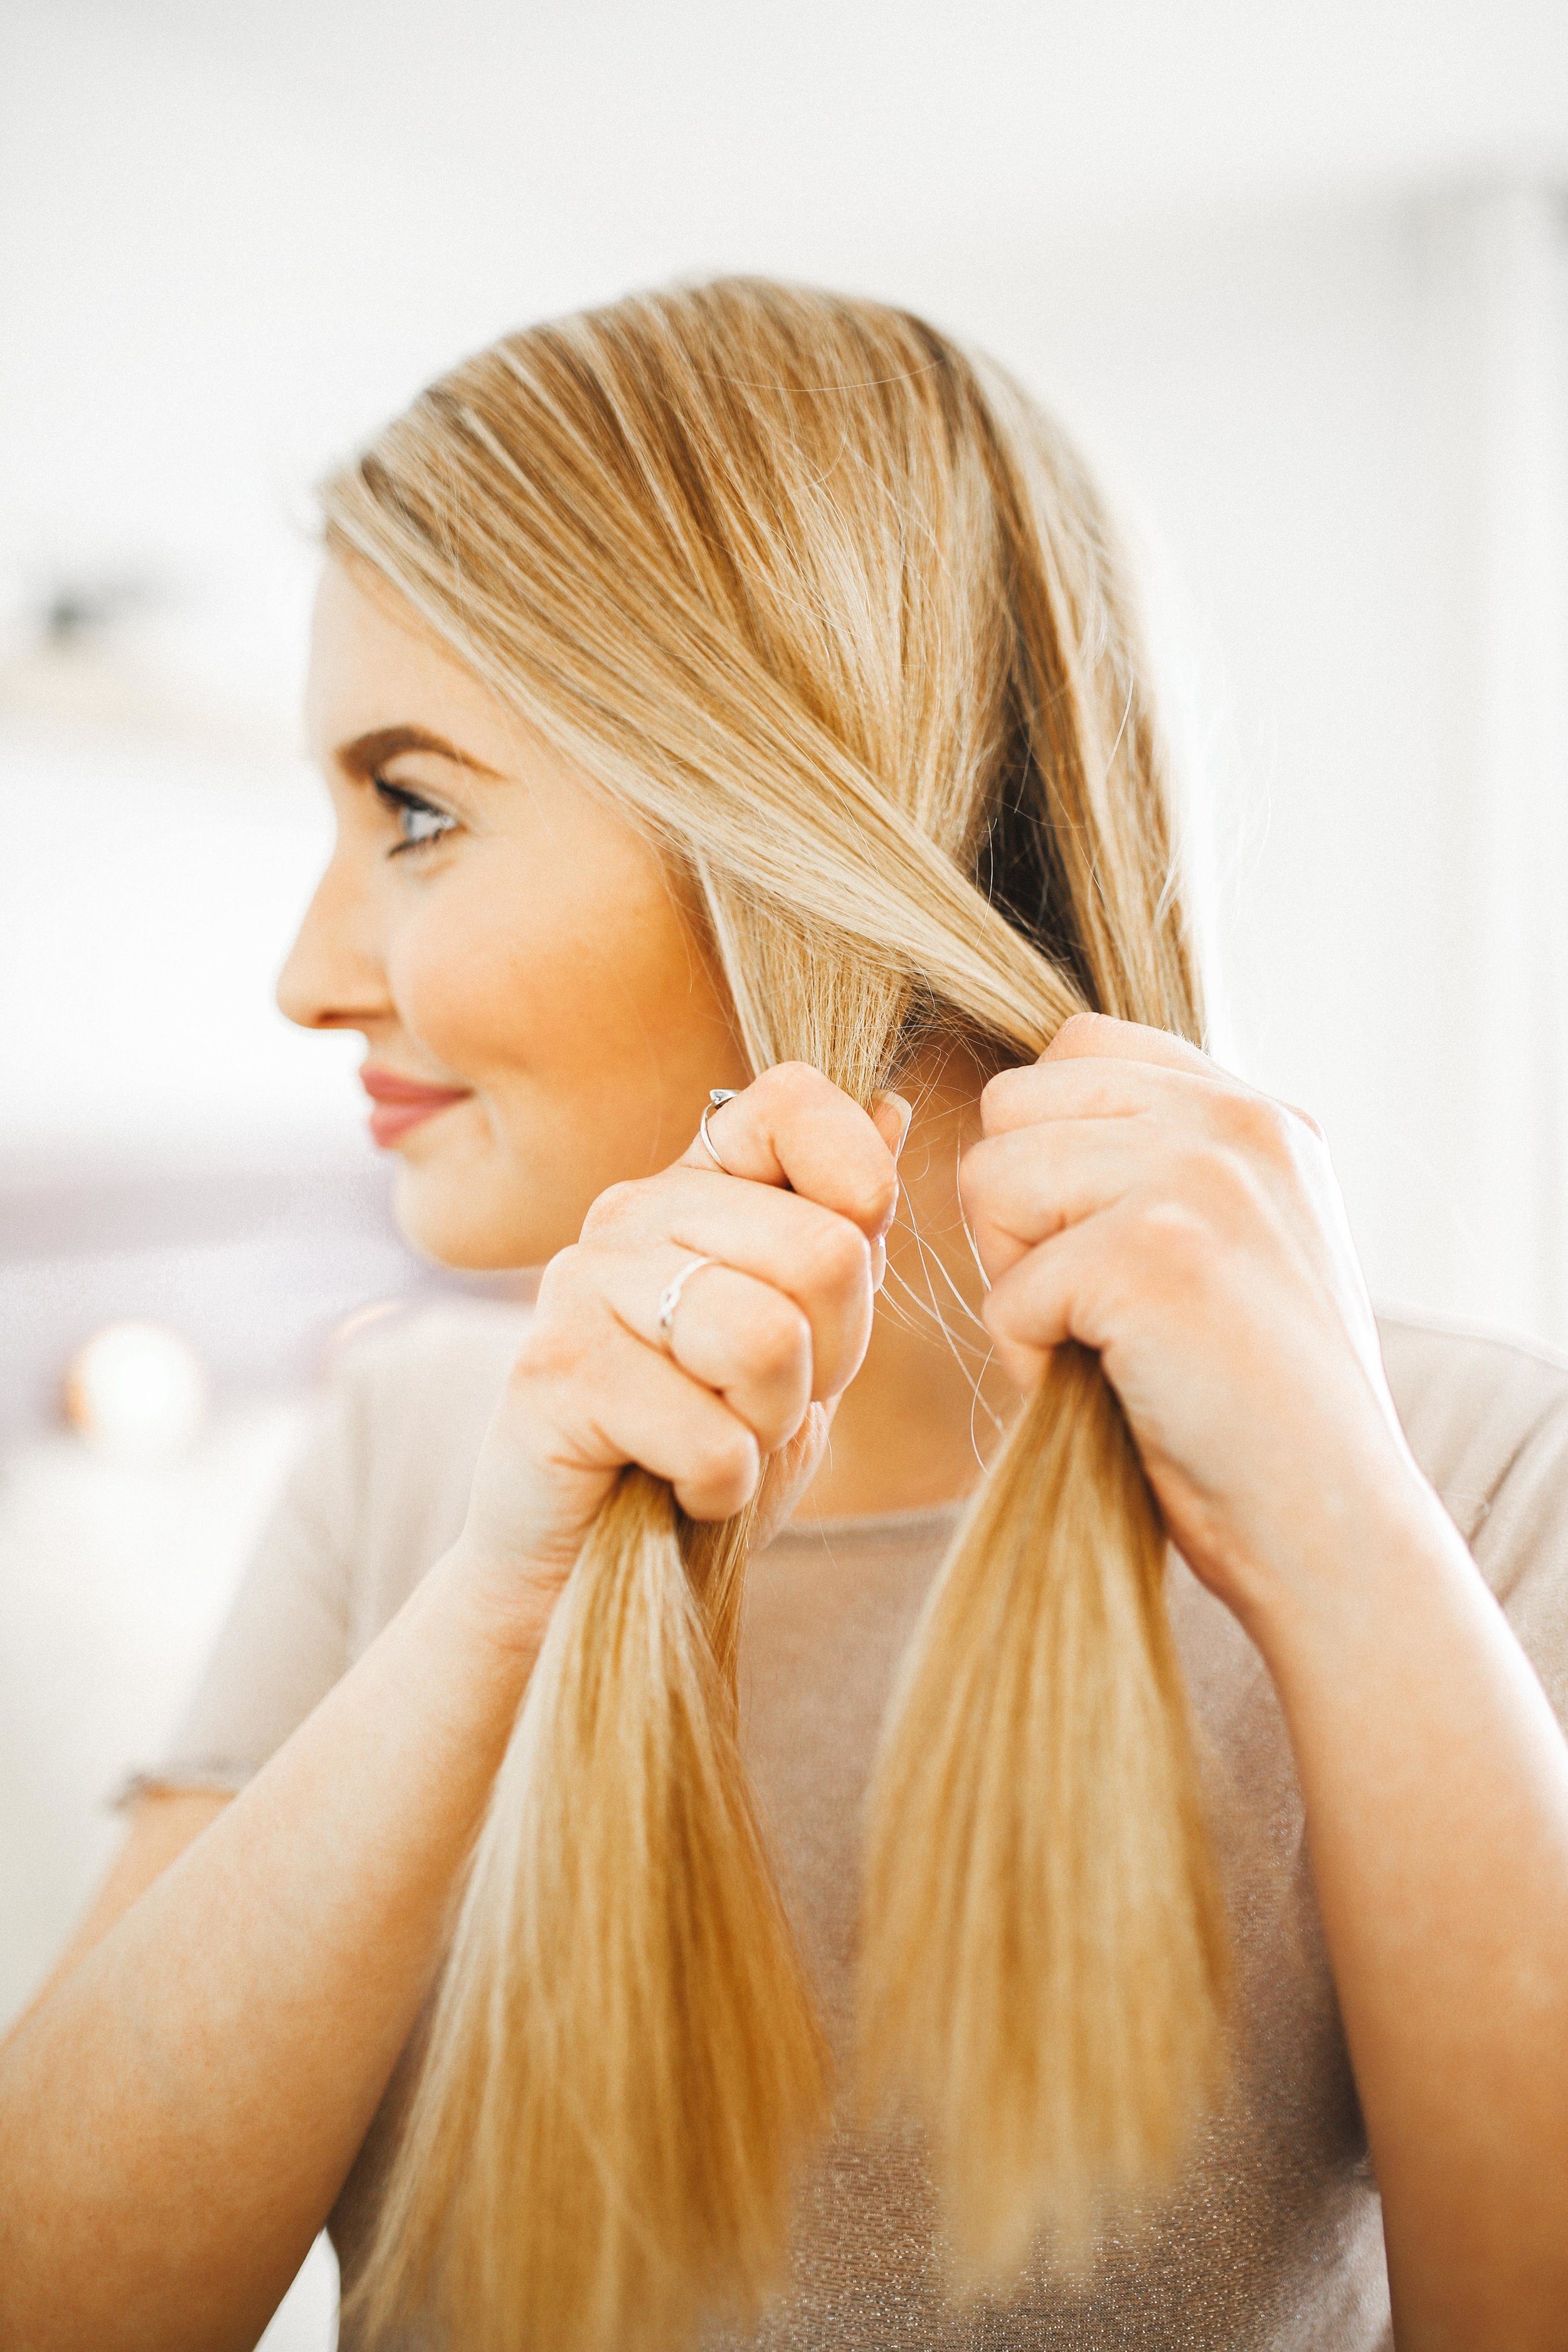
Step 05: Do the same with the other side, bring a small section from the outer edge and add it to the other section.

Step 06: Continue this process throughout the entire length of your hair. Be sure to hold both sections tight & pull when you add new sections. We will loosen it later.

Step 07: Once you get to the bottom of your hair, secure it with your choice of an elastic.

Step 08: Make it unique, loose, tight, have fun with it. I like pulling from the inside out to loosen the edges so the braid doesn't look too tight!

Step 09: Take some hairs out! Make it look natural. I like taking out some around my ears, and forehead.

Step 10: You now officially have completed your first fishtail braid, or your first one to the side. Congrats you Fish Out Of Water. Take a selfie and share it with me using #MaddyCorbinBeauty!

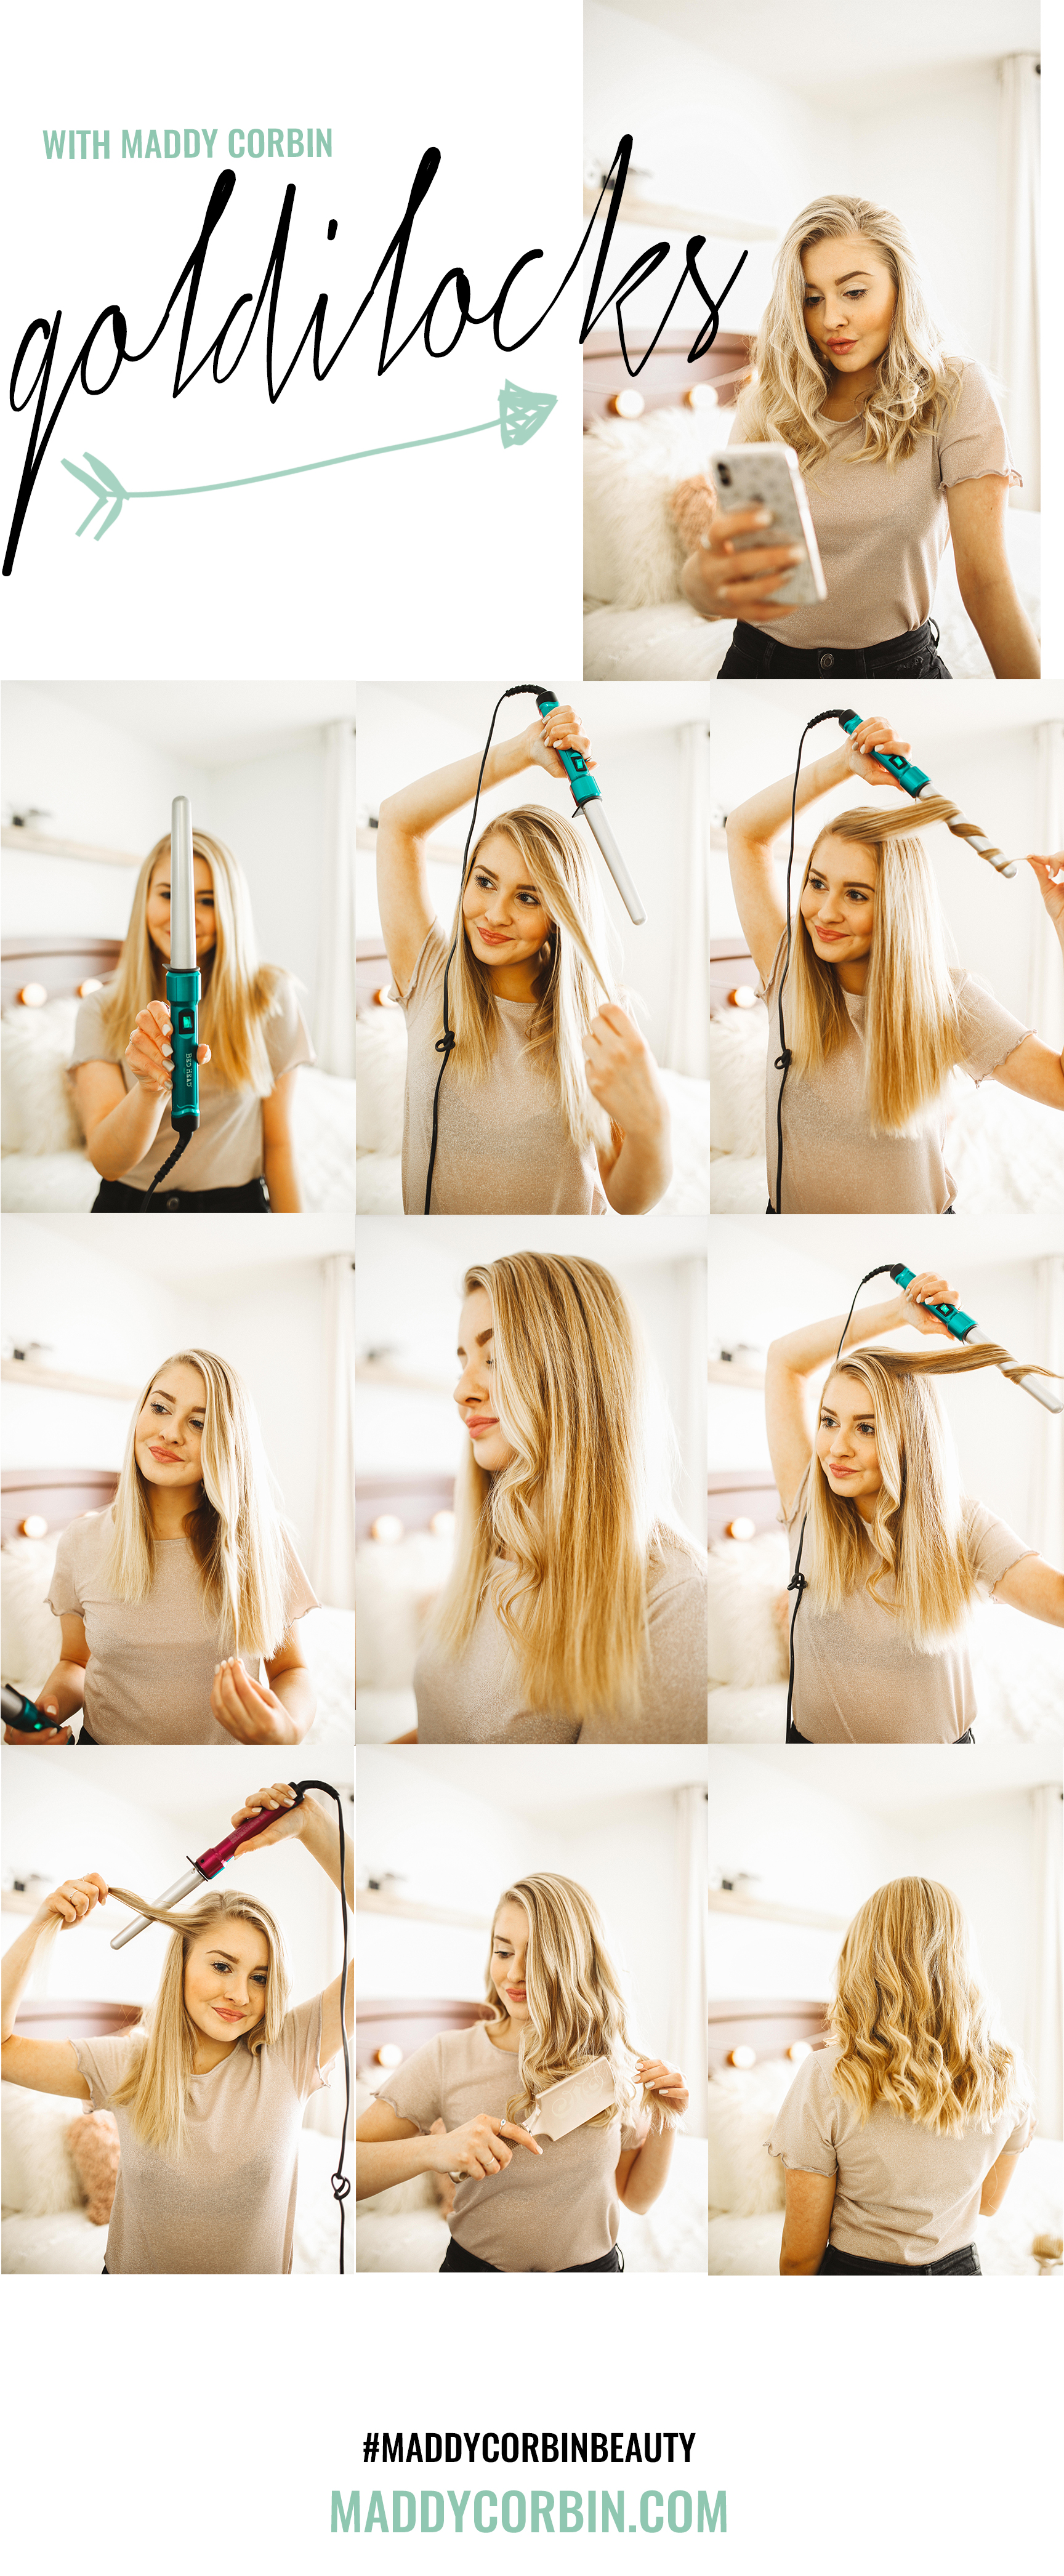
GOLDILOCKS ↓
the perfect curls with my Bedhead wand
STEP 01: Start with your favorite wand iron. I always love my Bedhead — shop it here!
Step 02: Start with the iron facing DOWN. Pull your hair back on it so you are curling away from your face.
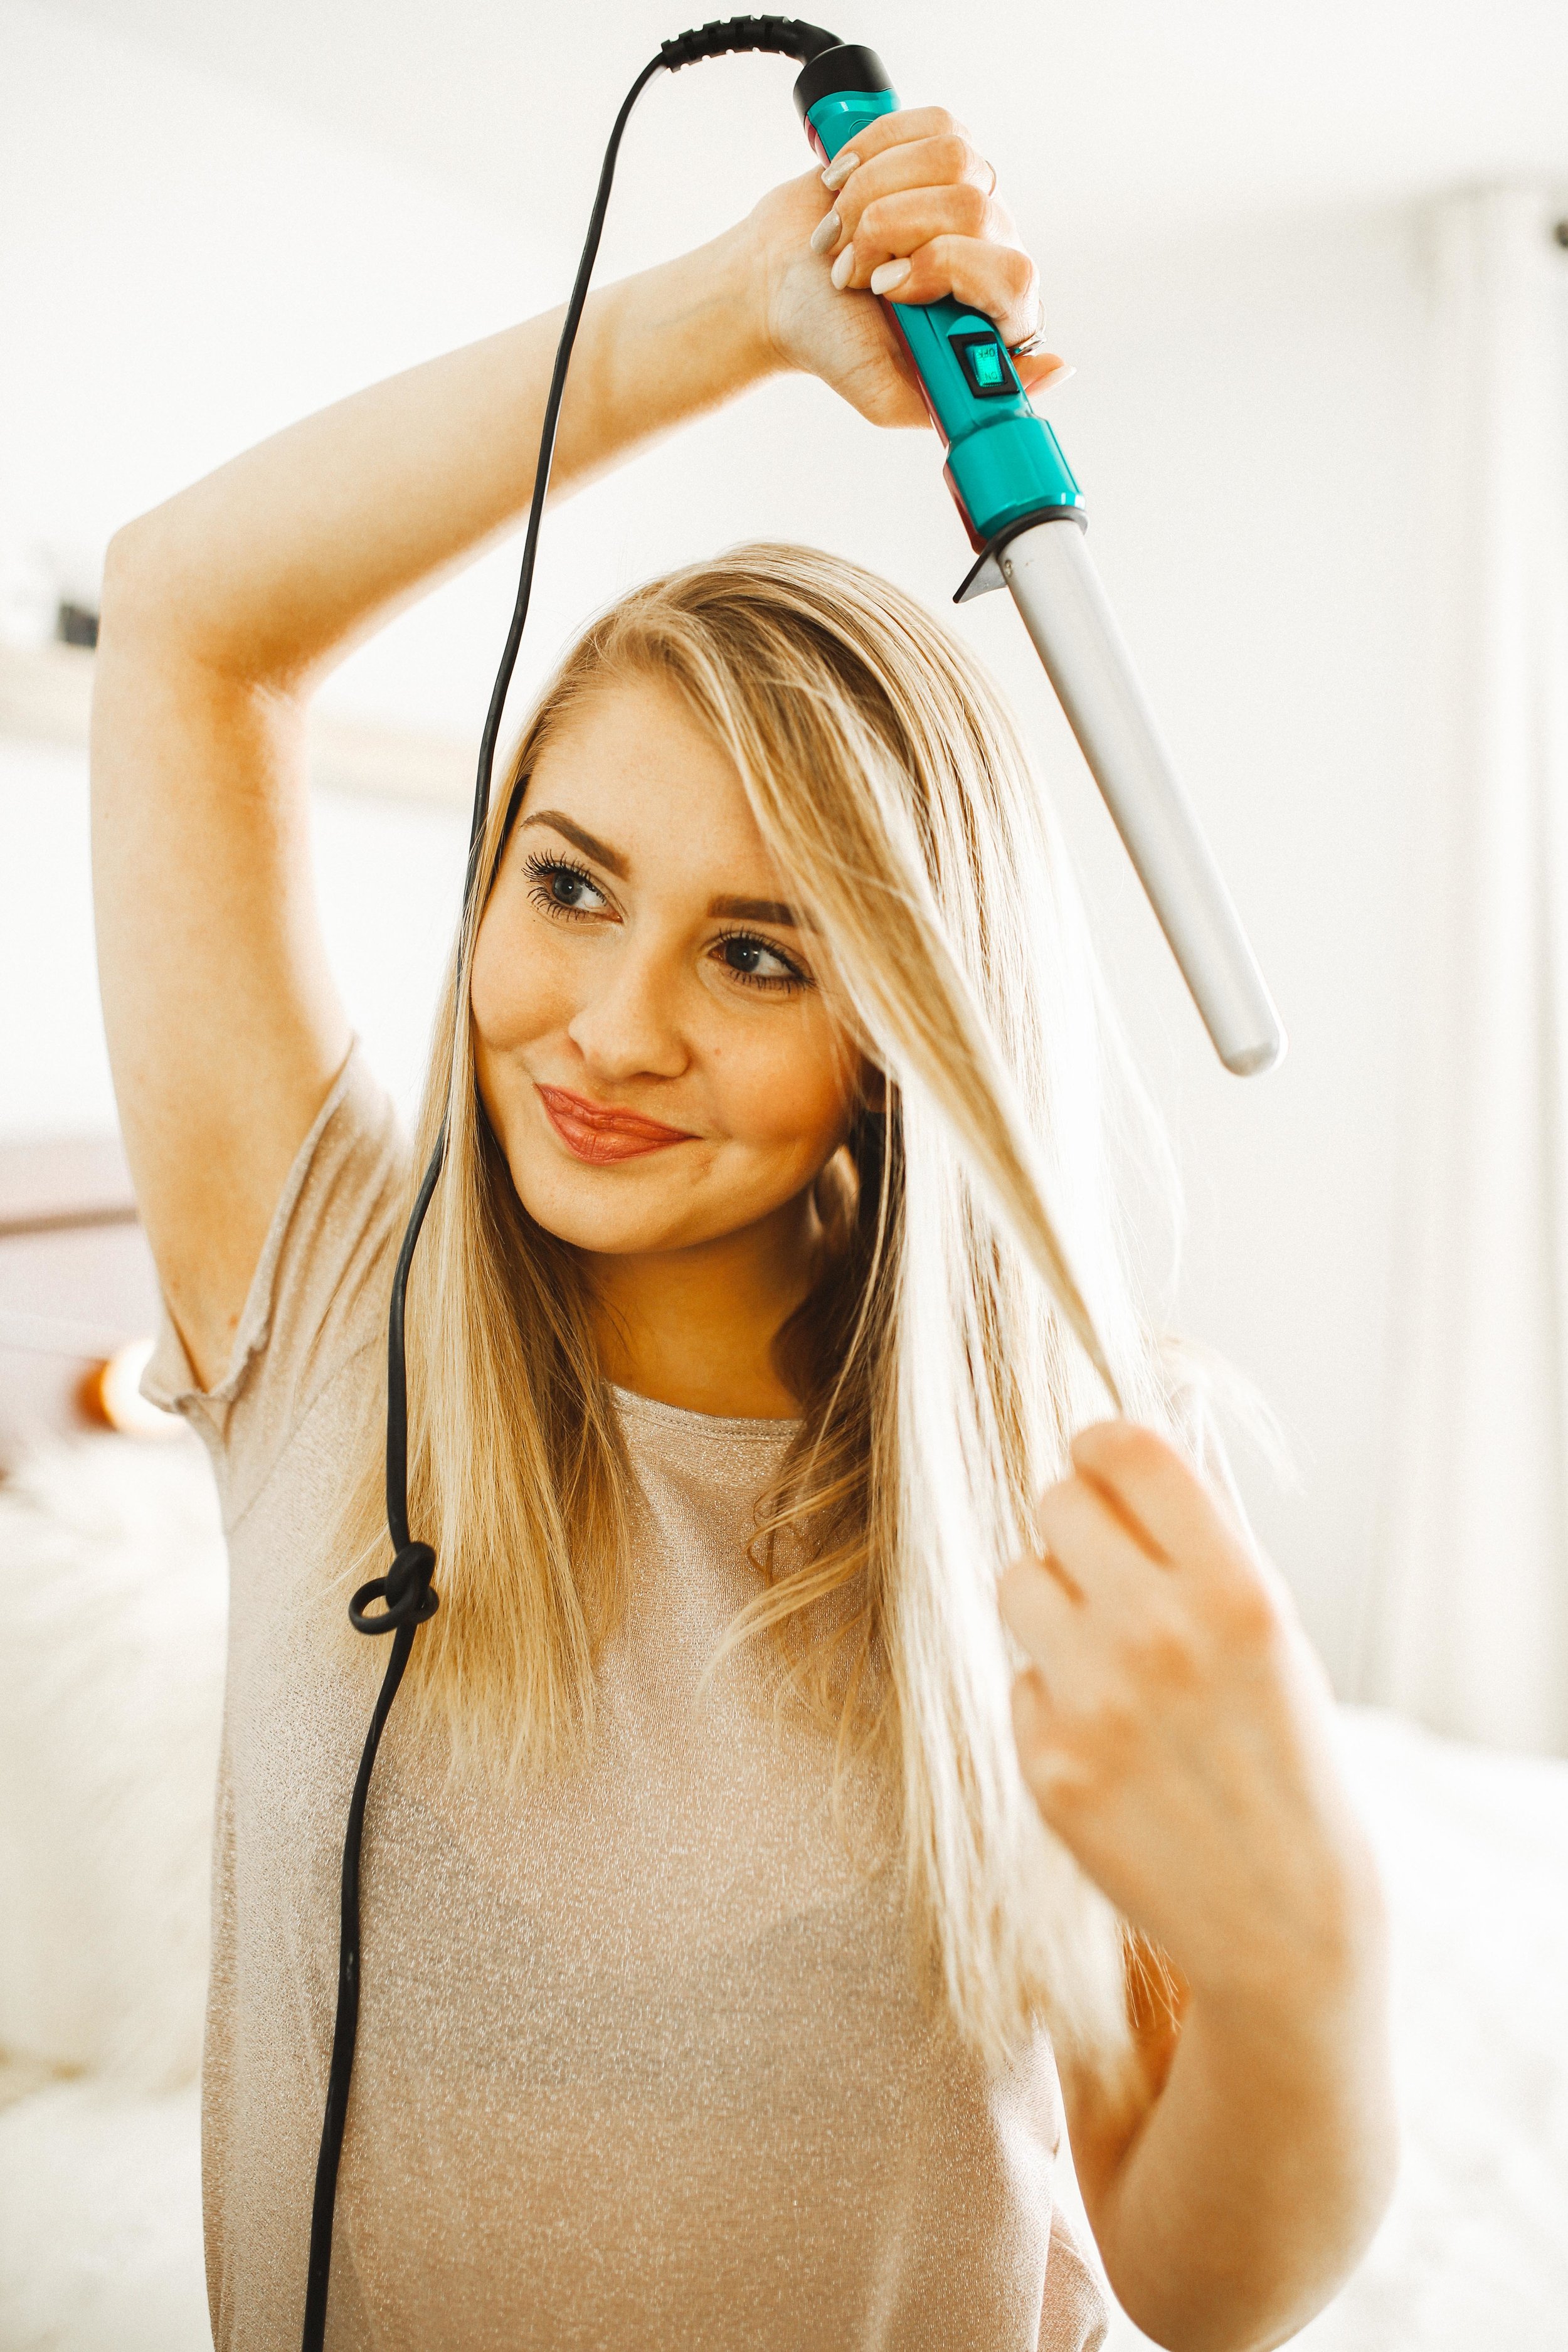
Step 03: Wrap your hair around the wand away from your face and hold it for about 5 seconds.

Step 04: After 5 seconds take your hair off the wand and hold it down to loosen the warm curl.

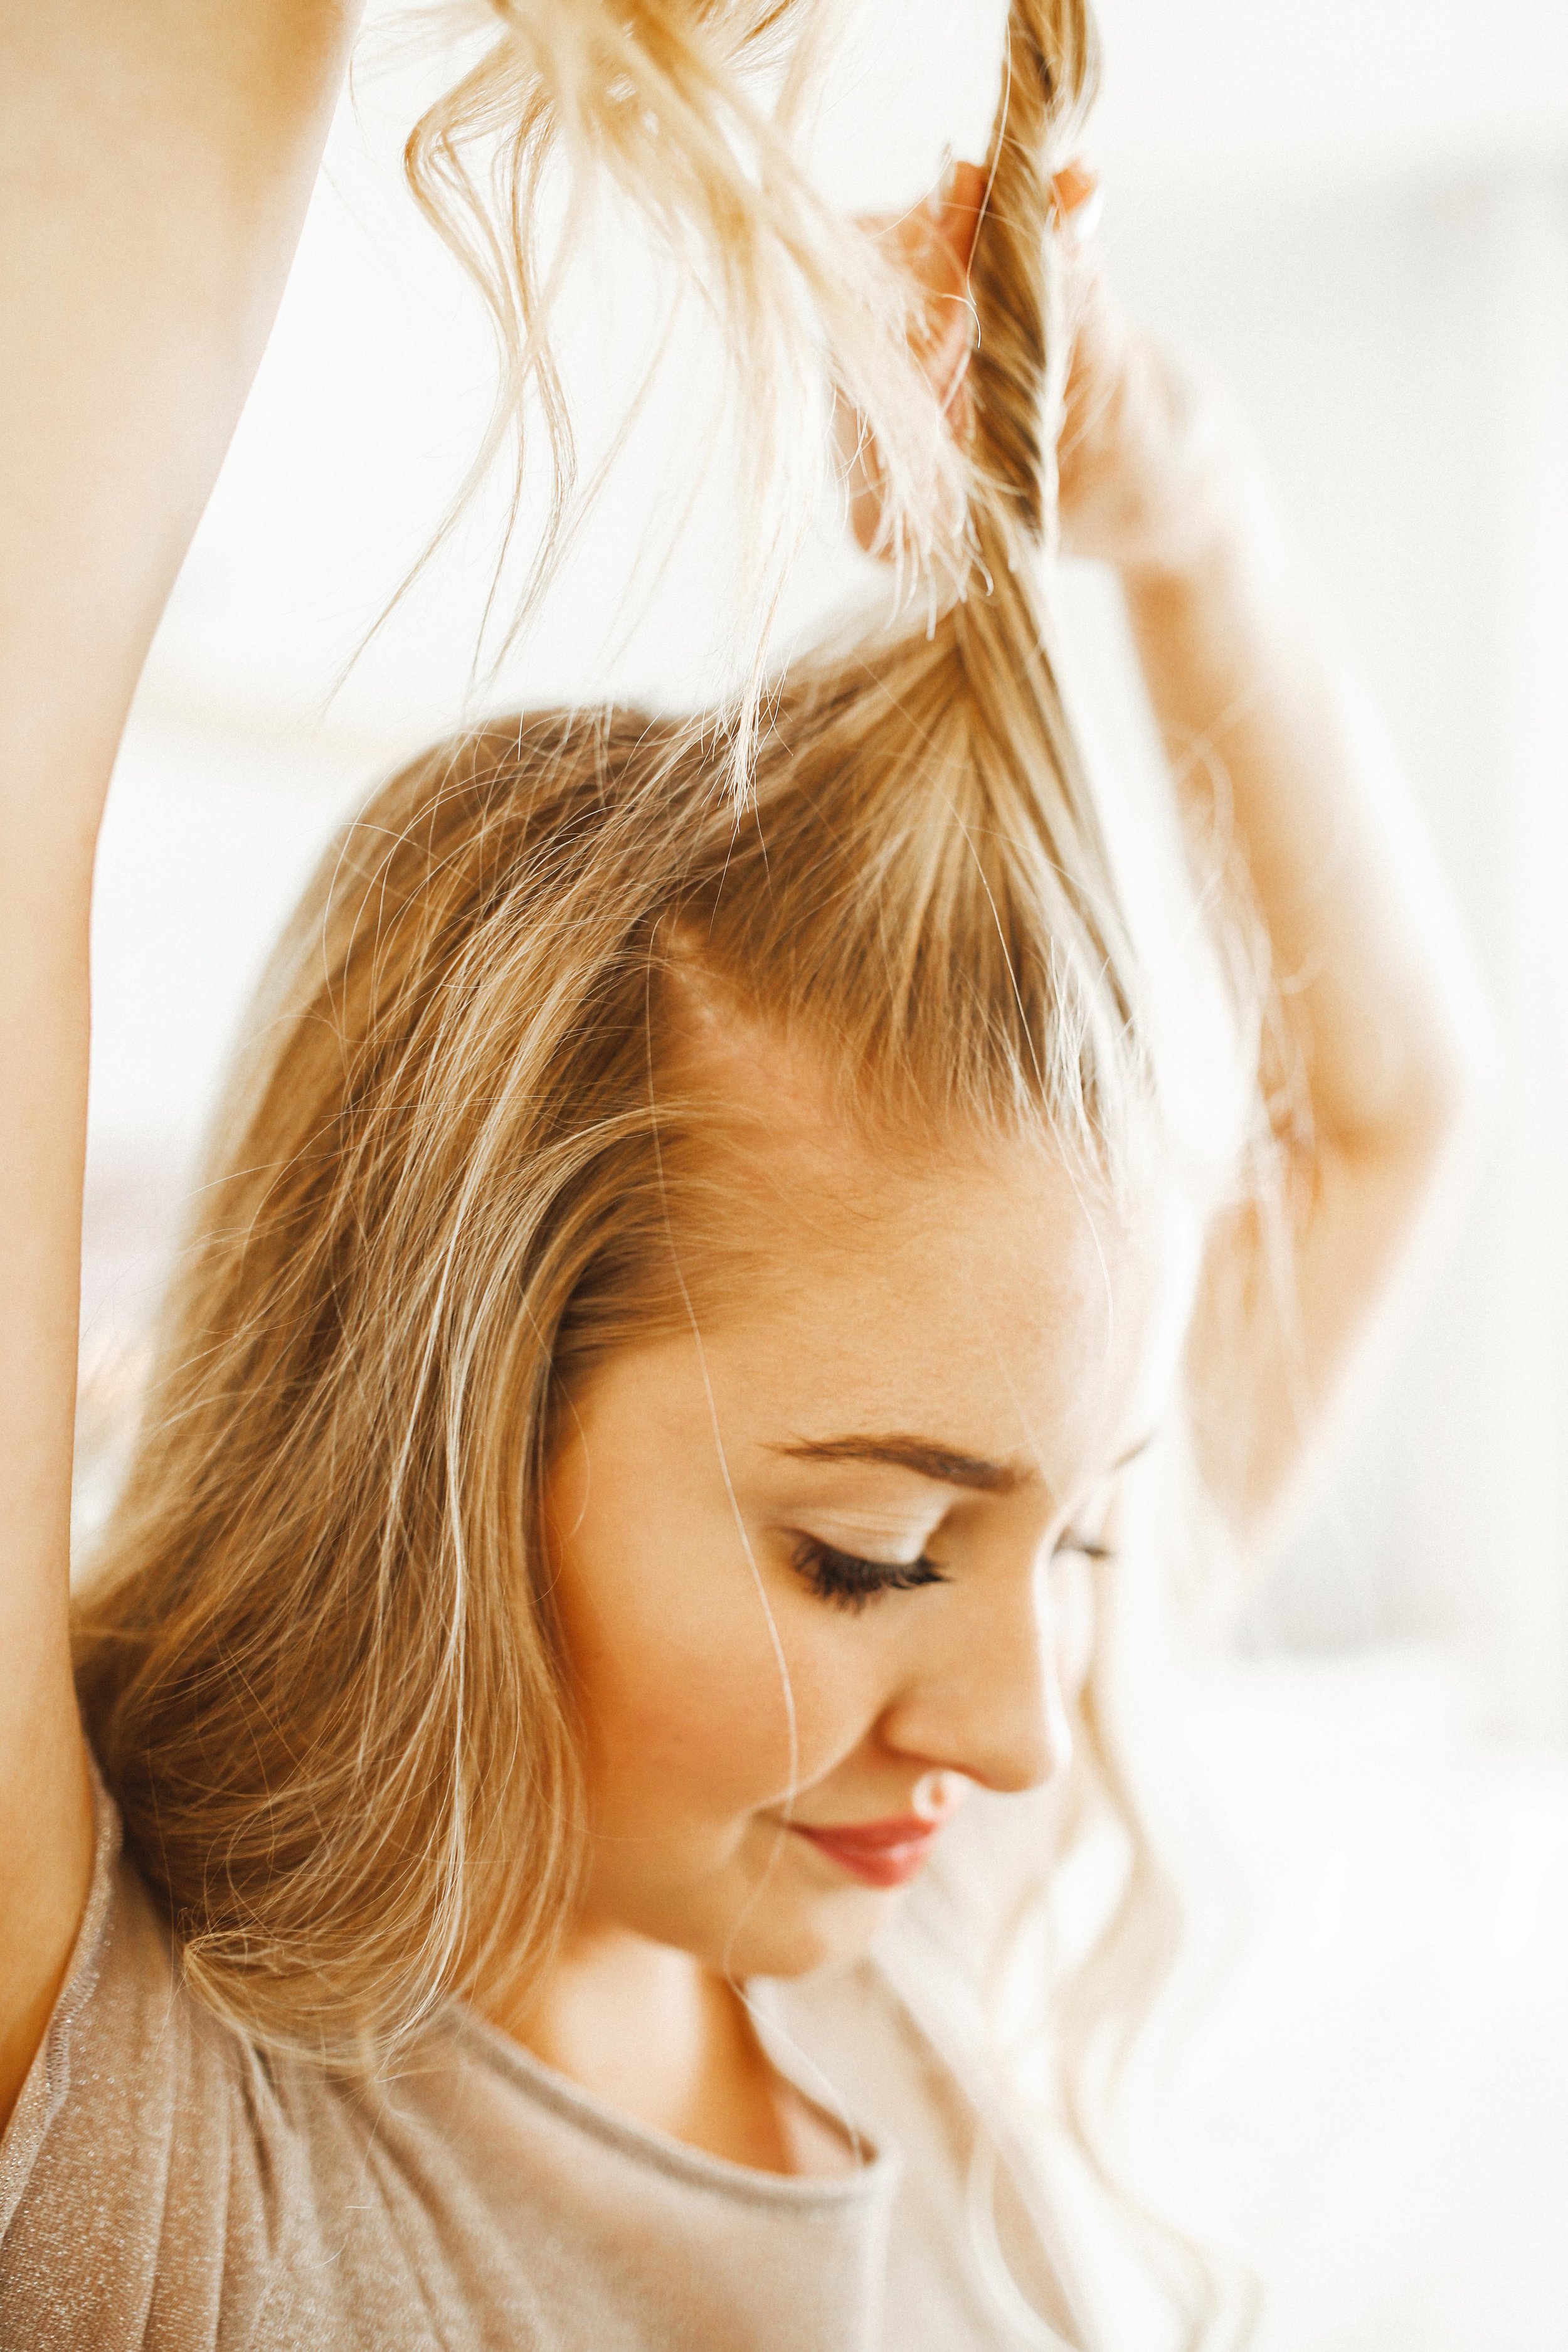
Step 05: Congrats! You have your first goldilocks curl. This is my favorite hairstyle!

Step 06: Continue this process throughout this side of your head. Stop when you get half way.
Step 07: Once you've made it half way through your head, switch hands and curl the other side aways from your face!

Step 08: Brush through those curls to make them more natural and break them up!

Step 09: Shake out the curls, I don't normally use hairspray but here you can!

Step 10: Take a selfie you goldilocks you! Share those curls with me at #MaddyCorbinBeauty!

CHEERY ON TOP ↓
a mini-bun to sit on top of a bed of curls
Step 01: Start with those goldilocks curls from the previous tutorial.

Step 02: Take a section of hair from the front of your hair and hold it over your head, this will be your Cherry On Top.

Step 03: Twist the section of your while holding it.
Step 04: Twist the twist around your fingers, take your finger out & secure it via bobby pin.

Step 05: Play with it! Make it bigger, scrunch it, secure it, add an elastic — whatever you want! :)

Step 06: Hm.... looks like the perfect cherry on top!

Step 07: I always use a TON of hairspray on my mini-buns. If you want to add hairspray to yours, do that now!

Step 08: YUP! You guessed it, #selfie time to #MaddyCorbinBeauty!

PIN ME!!! ↓
add your favorite long hair styled to your perfect-life Pinterest boards!